Birthday Week: DIY Dog Bone Art

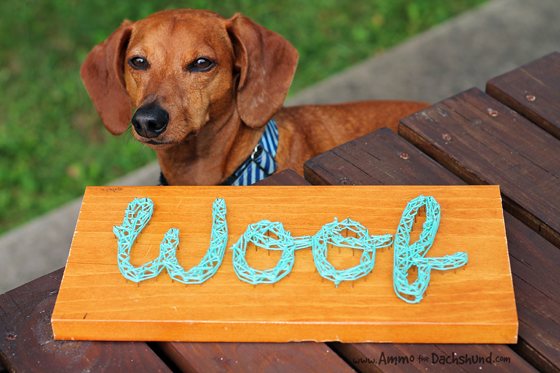
Birthday Week isn’t over yet my friends! We’re just getting started! Today I’ve got a super fun tutorial for some DIY Art you can make to brighten up your own home.

Birthday Week: DIY Dog Bone Art

This DIY Dog Bone Art is easy to make, and so fun and cheerful too!

Birthday Week: DIY Dog Bone Art

DIY Dog Bone Art Supplies:

*affiliate link

Birthday Week: DIY Dog Bone Art

Birthday Week: DIY Dog Bone Art

Step 1: Choose 2 milkbones and spray paint with your favorite color

Birthday Week: DIY Dog Bone Art

Step 2: Optionally you may choose to paint your frame the same color as well, or leave it as is.

Birthday Week: DIY Dog Bone Art

Step 3: Once your paint is dry, remove the glass from your frame and add either a piece of colored mat board (which is what we used) or some colored paper. If you use colored paper make sure it’s glued down to something stiffer like a piece of cardboard.

Birthday Week: DIY Dog Bone Art

Birthday Week: DIY Dog Bone Art

Step 4: Using an adhesive, glue your milkbones in place on the frame.

Birthday Week: DIY Dog Bone Art

Step 5: Hang and enjoy!

Birthday Week: DIY Dog Bone Art

Just remember, even though your milkbones are now painted, they still smell like cookies to us dogs! So don’t display them anywhere your dog could get to them.

Mom has already told me many times I can look, but I can’t eat! (Apparently this art project isn’t interactive).

Birthday Week: DIY Dog Bone Art

Despite the fact that this new DIY Dog Bone Art isn’t edible, I have to admit, it does add a little happy to my home!

Do you have any dog inspired art hanging in your home?Ammo the Dachshund // Blog Signature // Celebrity

Check back later today for some super adorable throwback puppy photos and videos of yours truly. It’s so adorable, you’re not going to be able to stand it!

12 Days of Cheer! DIY Holiday Dog Collar Flair

12 Days of Cheer! DIY Holiday Dog Collar Flair // Ammo the Dachshund

Yippee! It’s almost Christmas! And to get in the holiday spirit, I thought I’d share my fun an easy DIY for some holiday dog collar flair!

12 Days of Cheer! DIY Holiday Dog Collar Flair // Ammo the Dachshund

Here’s what you’ll need:

12 Days of Cheer! DIY Holiday Dog Collar Flair // Ammo the Dachshund

Following the directions that came with your fabric covered button kit, use your holiday fabric to create a button. For mine I used a 1″ kit.

12 Days of Cheer! DIY Holiday Dog Collar Flair // Ammo the Dachshund

Choosing a smaller pattern works best and may depend on the size of your button.

12 Days of Cheer! DIY Holiday Dog Collar Flair // Ammo the Dachshund

Then simply tie a small piece of elastic to the back of the button loop that will securely hold your button to the collar (thin elastic works best).

12 Days of Cheer! DIY Holiday Dog Collar Flair // Ammo the Dachshund

Then slip it onto your dog’s favorite collar, and you’ve got yourself some holiday flair!

12 Days of Cheer! DIY Holiday Dog Collar Flair // Ammo the Dachshund

Simple, fun, and oh-so-festive!

12 Days of Cheer! DIY Holiday Dog Collar Flair // Ammo the Dachshund

12 Days of Cheer! DIY Holiday Dog Collar Flair // Ammo the Dachshund

They were so easy to make that now I can’t decide which ones to wear….perhaps I should just wear them all!

12 Days of Cheer! DIY Holiday Dog Collar Flair // Ammo the Dachshund

Make sure to post your dog’s holiday flair on my Facebook page, so we can all join in on the festive fun! Happy Holidays! Ammo the Dachshund

Birthday Week: DIY Dog String Art

DIY Dog Nail Art // Woof // Ammo the Dachshund

Since I’m celebrating Birthday Week on the blog, I thought it would be fun to share a fun DIY for some dog inspired artwork! You’ll love this fun tutorial to add a little extra woof to your own home!

String Art isn’t a new concept, all you have to do is search pinterest and tons of examples will pop up. After seeing lots of fun renditions on the web I thought it would be fun to create my own design, with man’s best friend in mind!

DIY Dog String Art

DIY Dog Nail Art // Woof // Ammo the Dachshund

Supplies:

DIY Dog Nail Art // Woof // Ammo the Dachshund

Step 1: Tape your printed type onto your block of wood. You can really use anything from shapes to various words and even logos.

DIY Dog Nail Art // Woof // Ammo the Dachshund

DIY Dog Nail Art // Woof // Ammo the Dachshund

Step 2: Nail your brads along the inner and outer edges of your text.

DIY Dog Nail Art // Woof // Ammo the Dachshund

Step 3: Remove the paper.

DIY Dog Nail Art // Woof // Ammo the Dachshund

Step 4: Tie your string to one of the nails and begin winding around them in every which direction. It helps if you outline each of the letters with string before filling them in.

DIY Dog Nail Art // Woof // Ammo the Dachshund

Step 5: Continue this process for each of the letters until they are all filled in with string.

DIY Dog Nail Art // Woof // Ammo the Dachshund

Congrats! You now have some fun dog-inspired string art!

DIY Dog Nail Art // Woof // Ammo the Dachshund

I think it turned out pretty fantastic, and I can’t wait to come up with some more fun designs!

DIY Dog Nail Art // Woof // Ammo the Dachshund

DIY Dog Nail Art // Woof // Ammo the Dachshund

DIY Dog Nail Art // Woof // Ammo the Dachshund

I can’t wait to see what fun string art you come up with! Be sure to share your String Art projects on my Facebook page! Ammo the Dachshund

When Dogs Go Stand Up Paddleboarding

Stand Up Paddleboarding with your dog // Ammo the Dachshund

I’m no stranger to the lake, and one of my favorite warm-weather activities is to go Stand Up Paddleboarding (aka SUP) with my mom and dad. So over the weekend we hit up our favorite lake and boat rental – Marsh Creek Lake.

Stand Up Paddleboarding with your dog // Ammo the Dachshund

I enjoy the paddleboard more than any of the other rentals (kayak, motorized rowboat, sailboat) because the paddleboard puts me the closest to the water – and I do in fact enjoy swimming when the water is just the right temperature.

Stand Up Paddleboarding with your dog // Ammo the Dachshund

Most of the time I end up taking a dive into the water when mom and dad drift too far apart. I think I channel my inner herding dog (thanks to my pal Trooper) and I worry a bit when my “pack” gets too far apart. So I’ll dive into the water and swim to dad to make sure he’s still ok.

Stand Up Paddleboarding with your dog // Ammo the Dachshund

When we finally get further out on the lake it’s enjoyable just to lay around on the paddleboards and soak in the sun. After all summer is almost here – and I gotta work on my tan!

Stand Up Paddleboarding with your dog // Ammo the Dachshund

Stand Up Paddleboarding with your dog // Ammo the Dachshund

As much as attention as I tend to draw on the lake – you would think that it’s pretty rare to see dogs out on the water.

Stand Up Paddleboarding with your dog // Ammo the Dachshund

But in actuality I tend to see quite a few dogs when I head out, like this pup Kahula, who’s owner has an awesome go-pro setup on their board and posts amazing instagram photos of their paddleboarding adventures.

So if you’re looking for a fun summertime activity to enjoy with your dog I highly recommend paddleboarding. You can check with your local boat rental to see if they allow dogs on their rentals (as I’ve found most do) and even if the paddle board isn’t for you there are lots of other rentable water vessels! Just make sure your pup wear’s it’s life vest! Mine is from my friends at Kurgo. Ammo the Dachshund


12 Days of Cheer! DIY Easy Gold Dog Ornaments

With Christmas just around the corner Mom and I decided to add a little bling to our tree! (inspired by this tutorial) This super easy DIY is also great to use as gifts for all your doggie friends! So easy your could make these this weekend as gift toppers for all your gifts!

12 Days of Cheer! Easy DIY Gold Dog Ornaments // Ammo the Dachshund

12 Days of Cheer! Easy DIY Gold Dog Ornaments // Ammo the Dachshund

Materials:

12 Days of Cheer! Easy DIY Gold Dog Ornaments // Ammo the Dachshund


Optional Supplies:

12 Days of Cheer! Easy DIY Gold Dog Ornaments // Ammo the Dachshund

Step 1: Lay out a sheet of wax paper and using your rolling pin flatten out a piece of model magic that is large enough to fit your cookie cutter. Keeping it about 1/2″ to 1″ thick.

12 Days of Cheer! Easy DIY Gold Dog Ornaments // Ammo the Dachshund

Step 2: Press your cookie cutter into the model magic.

12 Days of Cheer! Easy DIY Gold Dog Ornaments // Ammo the Dachshund

Step 3: Tear away the excess and poke your bamboo skewer into the spot where you want the string for hanging to be.

12 Days of Cheer! Easy DIY Gold Dog Ornaments // Ammo the Dachshund

12 Days of Cheer! Easy DIY Gold Dog Ornaments // Ammo the Dachshund

Step 4: (optional) You can stamp a name or word into your ornament using the rubber stamps if you choose. It’s a great way to personalize them for all your friends! (no ink required as you will be painting them later)

12 Days of Cheer! Easy DIY Gold Dog Ornaments // Ammo the Dachshund

Step 5: Allow the model magic ornaments to dry for several days so that they harden. (they will harden faster if you set them near a heat source (not on it!) and remove them from the wax paper)

12 Days of Cheer! Easy DIY Gold Dog Ornaments // Ammo the Dachshund

Step 6: Once your ornaments have hardened you can add a few coats of gold spray paint (or really any color you like). Optional – add some glitter by sprinkling it on while your paint is still wet.

12 Days of Cheer! Easy DIY Gold Dog Ornaments // Ammo the Dachshund

Then just add some twine and your ornaments are ready to hang on your tree or gift to a friend!

12 Days of Cheer! Easy DIY Gold Dog Ornaments // Ammo the Dachshund

12 Days of Cheer! Easy DIY Gold Dog Ornaments // Ammo the Dachshund

Only thing that would make these better is if they were actually edible (which sadly they are not), paws crossed for edible dog bone ornaments for next year! Ammo the Dachshund

Shop with Ammo // Flying Hero Etsy Shop

That time I was in Redbook Magazine

Oh yes, you read that right, I’ve graced the pages of Redbook Magazine in their recent December issue!

That Time I was in Redbook Magazine // Ammo the Dachshund

That Time I was in Redbook Magazine // Ammo the Dachshund

My DIY Christmas Eve Outfit from last year made their 31 Days of Free Winter Fun guide.

That Time I was in Redbook Magazine // Ammo the Dachshund

They even posted my full tutorial on their blog. Next thing you know I’ll be in the tabloids – “Ammo the Dachshund seen roaming the streets in the nude”. 🙂 Ammo the Dachshund

12 Days of Cheer! DIY Holiday Dog Ornaments

One of my favorite things about the holidays is decorating the house with lots of Christmas Cheer! So this year my mom decided to help me make some festive ornaments to hang on my tree. These DIY Holiday Dog Ornaments will add a little WOOF to any home!

12 Days of Cheer! Ammo the Dachshund's DIY Holiday Dog Ornaments

Supplies:

12 Days of Cheer! Ammo the Dachshund's DIY Holiday Dog Ornaments

12 Days of Cheer! Ammo the Dachshund's DIY Holiday Dog Ornaments

Step 1: After choosing photos of your pet to use (it helps if they have a white background) print them out on your iron-on transfer paper. Follow the directions on the package for printing, and remember to mirror your image.

12 Days of Cheer! Ammo the Dachshund's DIY Holiday Dog Ornaments

Step 2: Cut your images out of the print-out.

Step 3: Iron on your images to your white fabric, making sure you follow the directions on your iron-on transfer paper package.

12 Days of Cheer! Ammo the Dachshund's DIY Holiday Dog Ornaments

Step 4: Cut each image out of your fabric, making sure to leave at least a 1 inch space around each image. By using something as a template you can also cut them out in the shape of a circle, which will be easier to sew down the line.

12 Days of Cheer! Ammo the Dachshund's DIY Holiday Dog Ornaments

Step 5: Next you will want to cut shapes out of your colorful Christmas fabric that are the same size as the images. These will serve as the backing for your ornament.

12 Days of Cheer! Ammo the Dachshund's DIY Holiday Dog Ornaments

Step 6: Using the baker’s twine you’ll want to cut a small piece and tie it into a bow. Then with your needle and thread stitch your bow onto the image transfer of your pet.

12 Days of Cheer! Ammo the Dachshund's DIY Holiday Dog Ornaments

Step 7: Then you will want to sew your ornament together. Place your colored fabric ONTOP of your image and then using your sewing machine (or by hand) stitch nearly all the way around your ornament, leaving about a 1/2 an inch of the fabric un-sewn.

Step 8: Flip your sewn ornament inside out so that now the image is on the outside. Then stuff with cotton.

Step 9: Cut a piece of bakers twine to be used to hang your ornament and knot it into a loop. Then using a needle and thread stitch the top of your ornament (and the loop) closed.

12 Days of Cheer! Ammo the Dachshund's DIY Holiday Dog Ornaments

Step 10: Marvel in your diy-ness and enjoy your new ornaments!

12 Days of Cheer! Ammo the Dachshund's DIY Holiday Dog Ornaments

I’m thoroughly enjoying my new ornaments, and I think they’re super cute !

12 Days of Cheer! Ammo the Dachshund's DIY Holiday Dog Ornaments

12 Days of Cheer! Ammo the Dachshund's DIY Holiday Dog Ornaments

I bet you can guess which one’s my favorite! Ammo the Dachshund

*The photos used for my ornaments were from the lovely Brenda Carpenter & The Mutt Room!

Let’s Get Tricky! Teach your Dog to Play Dead

One of my most popular tricks is the Play Dead trick. Guaranteed to make children giggle and adults oooh and ahhh – it’s a favorite that’s sure to win them over!

Most all of my tricks are taught and mastered with the help of clicker training, so before beginning you might want to read up on how to introduce your dog to a clicker*.

*Disclaimer: this post does contain some affiliate links

Ammo the Dachshund // Lets Get Tricky // Teach Your Dog to Play Dead

Teach Your Dog to Play Dead

Every great dog should know how to play dead – if only to be used as an ice breaker at parties, to scare the ground hogs in the backyard, and to generally just make you look totally awesome.

What you need: A handful of small training treats*, clicker

Step 1: To start your dog should already know how to lay down on command. Place a few treats in a fist and place your hand on the ground in front of your dog as you ask them to lay down.

Ammo the Dachshund // Lets Get Tricky // Teach Your Dog to Play Dead

Step 2: As your dog sniffs the treat tilt your fist up and over the top of your dog’s head, encouraging them to lay on their side. You may need to gently push your hand into your dog to entice them to lay on their side. Click and Reward your dog as soon as their side touches the ground.

Ammo the Dachshund // Lets Get Tricky // Teach Your Dog to Play Dead

Step 3: Continue asking your dog to lay on their side with treats in the fist of your hand until you can ask them to lay on their side with just an open palm (treats removed) – then click and reward.

Ammo the Dachshund // Lets Get Tricky // Teach Your Dog to Play Dead

Step 4: Once your dog is laying on their side consistently you can begin to add a verbal and visual command to it. Point your finger at your dog and say Bang, Bang – if your dog doesn’t immediately flop on their side you can then use the open palm of your hand to remind them what to do, click and reward. Slowly begin waiting longer and longer to show them what to do with the flat of your hand until they offer laying on their side on their own. Jackpot treat your dog when they get it right.

Ammo the Dachshund // Lets Get Tricky // Teach Your Dog to Play Dead

Step 5: When your dog is consistent in laying on their side when you ask you will need to add a release word. Part of the appeal of a play dead trick is that your dog will “remain dead” until you tell them to come back alive. So after asking your dog to play dead, wait a few seconds and say OK (before your dog gets up on their own) to release them and then click and reward. The key is to time this right before your dog gets up on their own. Gradually begin asking them to stay on their side longer and longer until you are certain they will not get up until you give them the verbal OK.

Ammo the Dachshund // Lets Get Tricky // Teach Your Dog to Play Dead

Congratulations! Your dog can now play dead! You can now bring laughter and smiles to everyone!

Ammo the DachshundDisclaimer: The Let’s Get Tricky blog feature is designed to provide general information, instruction, and techniques that may not be suitable for everyone. Please note that we are not liable for any of your activities while attempting to teach your dog the techniques listed on this blog. Please train responsibly.


Learn how to teach your dog to high-five!

Birthday Week: DIY Pet Birthday Bandana

Birthdays call for celebration, and what better way to celebrate than a spiffy new bandana to let everyone know it’s your Birthday!

Birthday Week // DIY Pet Birthday Bandana // Ammo the Dachshund

And because I want everyone to celebrate with me, here’s a tutorial I created to help you make your own pet a celebratory bandana.

Birthday Week // DIY Pet Birthday Bandana // Ammo the Dachshund

DIY Pet Birthday Bandana

Materials:

*some links contain affiliate links

Birthday Week // DIY Pet Birthday Bandana // Ammo the Dachshund

Step 1: Using a ruler and cutting utensil, cut a bandana sized piece of fabric out of your material. We used a bandana I already had as a template, but you can also measure your pet’s neck and add about 4″ to be able to tie it. You might also opt to sew the edges of your bandana to prevent fraying before moving on to step 2.

Birthday Week // DIY Pet Birthday Bandana // Ammo the Dachshund

Step 2: You will need your HOORAY! stamp for this part (my mom carved mine, find out how to carve a stamp here or find out how to purchase one here). Use your sponge brush to apply screen printing ink or acrylic paint mixed with Textile Medium to the stamp.

Birthday Week // DIY Pet Birthday Bandana // Ammo the Dachshund

Step 3: Stamp your fabric in several places, re-applying paint after each one. Then allow to dry.

Birthday Week // DIY Pet Birthday Bandana // Ammo the Dachshund

Adding another color can add to the overall effect.

Birthday Week // DIY Pet Birthday Bandana // Ammo the Dachshund

And when you are all finished you will have a spiffy new bandana that’s perfect for celebrating my Birthday with me.

Birthday Week // DIY Pet Birthday Bandana // Ammo the Dachshund

Happy Birthday to me! Only 3 more days until I’m officially 4 and get to open all my presents!


My HOORAY! stamp was inspired by a post on Squirrelly Minds.Ammo the Dachshund

DIY Ombre Pet Bandana

DIY Ombre Pet Bandana via Ammo the Dachshund

Over the weekend mom and I had some fun with a little DIY project. I like to keep up with all the fashion trends, so I told mom I needed a stylish new Ombre Bandana for the summer! Ombre is new it thing, incase you didn’t know.

So here’s my super fun tutorial for a…

DIY OMBRE PET BANDANA

DIY Ombre Pet Bandana via Ammo the Dachshund

Supplies Needed:

  • Hanger (a plastic pant hanger works best)
  • Box of Dye (we ended up using a Royal Blue Color – not the pictured teal dye)
  • Cutting Tool (scissors or rotary cutter work fine)
  • Ruler or tape measure
  • White Fabric or Bandana (we used a white cotton jersey material, but the ombre color may show up better on a different material – we just didn’t have any on hand to experiment with) *we also pre-washed/shrunk our fabric before dying

DIY Ombre Pet Bandana via Ammo the Dachshund

Step 1: If you are using a piece of fabric vs. a pre-made bandana (sold at most craft stores, but better sized for a large dog), cut your fabric into a triangular shape that will fit your dog’s neck. Mom measured my neck then added 4″ to each side on the top to make room to tie it. Ex: my neck measured 12″ so we added 8″ total making the top measurement 20″ wide.

DIY Ombre Pet Bandana via Ammo the Dachshund

Step 2: Mix your dye as per the directions on the box. As a rule always add a little less water to your bucket – you can always add more water to dilute it later.

DIY Ombre Pet Bandana via Ammo the Dachshund

Step 3: Attach your bandana to the hanger.

DIY Ombre Pet Bandana via Ammo the Dachshund

Step 4: Dip the bandana 3/4 into the dye for about 5 seconds, then remove. Try to keep the bandana as level as possible when dipping into the dye.

DIY Ombre Pet Bandana via Ammo the Dachshund

Step 5: Next dip your bandana 1/2 way into the dye for 20 seconds.

DIY Ombre Pet Bandana via Ammo the Dachshund

Step 6: Remove the Bandana another 1/4 out of the dye so that just 1/4 remains in the dye. Leave it there for another 2 – 3 minutes. *you may have to experiment with dye times based on the type of fabric you are using and how quickly it soaks up the dye.

DIY Ombre Pet Bandana via Ammo the Dachshund

DIY Ombre Pet Bandana via Ammo the Dachshund

Remove from the dye and hang until dry.

DIY Ombre Pet Bandana via Ammo the Dachshund

The waiting is the hardest part!

DIY Ombre Pet Bandana via Ammo the Dachshund

When your bandana is dry you will have a stylish new accessory perfect for the summer! Yay!

DIY Ombre Pet Bandana via Ammo the Dachshund

Of course I had to break mine in by rolling in the stinkiest dead animal smell I could find. It was glorious!