Recovering an Ottoman with a Helping Paw

Easter Egg Hunt for the Dogs // Ammo the Dachshund

This is my sunroom, my favorite room in the whole house. (Don’t mind the easter eggs and the snow outside – this was taken earlier this year). I spend a lot of time in here, since it’s got the best view! See that ottoman in the middle, well I also spend a lot of time on that sunbathing. Which is also the reason why mom decided that the fabric needed to be changed (on account of my “sometimes” muddy paws).

Now I’m no stranger to furniture restorations, I’ve helped mom repaint chairs, and dressers – but this would be my first fabric recover!

Furniture Restoration // Ammo the Dachshund

So mom broke out the tools, but that’s not really how this Dachshund rolls – especially when you have some built-in tools of your own…..

And thanks to me, about an hour later I was looking at my brand-new ottoman!

Furniture Restoration // Ammo the Dachshund

Furniture Restoration // Ammo the Dachshund

Covered with a charcoal grey sunbrella fabric, mom says it’s designed to take a bit more of a beating than what was previously on it.

Furniture Restoration // Ammo the Dachshund

As long as these paws are still allowed on the furniture than it’s A-OK with me! Ammo the Dachshund

DIY Dachshund Cork Board

When I came across this DIY project on pinterest, it inspired me to create something similar for all the dog (and dachshund) lovers out there! So I enlisted the help of my mom and whipped up this fun DIY project…

DIY Dachshund Cork Board via Ammo the Dachshund

DIY Dachshund Cork Board

This project can be made using any dog shape (not just a dachshund), so have fun, be creative, and create something unique!

DIY Dachshund Cork Board via Ammo the Dachshund

Materials:

*links contain affiliate links

Step 1: Adhere your cork onto a piece of cardboard using glue or a spray adhesive to make it a bit sturdier.

Step 2: If you would like to make a dachshund cork board download and print my dachshund shape, then cut it out. Otherwise you can print out a photo of your own dog (making sure to enlarge it) and cut out around the shape.

DIY Dachshund Cork Board via Ammo the Dachshund

Step 3: Using a sharpie trace around your stencil on your cork board.

DIY Dachshund Cork Board via Ammo the Dachshund

Step 4: Cut out your cork board shape using an exacto knife.

DIY Dachshund Cork Board via Ammo the Dachshund

Step 5: Place your frog tape in a striped pattern along the cork.

DIY Dachshund Cork Board via Ammo the Dachshund

Step 6: Paint onto the cork between your tape with acrylic paint, when it’s dry peel away the tape.

DIY Dachshund Cork Board via Ammo the Dachshund

Step 7: Cut a strip of ribbon to be used as a collar and staple or glue it to the cork on the back.

DIY Dachshund Cork Board via Ammo the Dachshund

Now you’re ready to hang your cork board up and enjoy!

DIY Dachshund Cork Board via Ammo the Dachshund

I’ve now got the perfect place to pin photos of all my girlfriends! Ammo the Dachshund

DIY: Build Your own 2×2 Agility Weave Poles

You might remember that back in November I posted a tutorial on how to build your own agility weave poles with the help of my friends at the Dog Agility Shop.

Well when winter rolled around I had to pack up my poles since it was just too cold to practice outdoors. That was until my dad surprised me for Christmas with a set of homemade 2×2 Weave Poles.

DIY 2x2 Dog Agility Weave Poles // Ammo the Dachshund

I’ve been using my set all winter, and I’m proud to say I can now weave, but I completely forgot to share how they were made with all of you! So better late than never – here’s my tutorial for building your own set of indoor 2×2 Weave Poles!

DIY Dog Agility 2×2 Weave Poles – Set of 6 poles

Supplies Needed:

Step 1: Cut your 3/4 inch PVC pipe into 6 pieces that are 38 inches in length. Then place the PVC caps on one end of all your poles. Then you can stripe your poles with colored duct tape to make them more visible.

DIY Dog Agility Weave Poles // Ammo the Dachshund

Step 2: Cut your Steelworks Plated Slotted Flats into three 36″ length pieces and six 9″ length pieces.

Step 3: Drill a hole the same size as your carriage bolts into the bottom of the PVC Plugs.

Step 4: Place the 9″ Slotted Flat pieces on opposite sides and 6 inches from either end of your 36″ length slotted flat pieces. Place your carriage bolts through from underneath to hold them together, with the PVC plugs on top. Add your washers and hex nuts to the inside of the PVC plugs and tighten to hold them together.

DIY 2x2 Dog Agility Weave Poles // Ammo the Dachshund

DIY 2x2 Dog Agility Weave Poles // Ammo the Dachshund

DIY 2x2 Dog Agility Weave Poles // Ammo the Dachshund

Step 5: Slip the PVC couplings onto the bottom of your poles and then slide them into the PVC plugs that are attached to the Slotted Flat pieces.

DIY 2x2 Dog Agility Weave Poles // Ammo the Dachshund

Step 6: Lay out the Weave Pole Placer as a guide as to where to place your poles (you can opt to leave it under the poles or remove it after they are placed). Your poles will work best on a carpeted surface.

DIY 2x2 Dog Agility Weave Poles // Ammo the Dachshund

DIY 2x2 Dog Agility Weave Poles // Ammo the Dachshund

For a quick tutorial on how to teach your dog the weave poles using the 2×2 method check out the video HERE. You may want to find a dog agility trainer or class in your area for more detailed instructions.

If you would like to make a set of outdoor weave poles, check out my tutorial HERE. Ammo the Dachshund

DIY Chalkboard Dog Bowl – Under $5

When I spotted this Chalkboard Dog Bowl over on Waggo I just knew I had to have it! Only when I asked mom if I could purchase it, she suggested why not DIY it? Oh but of course!

DIY Chalkboard Dog Bowl - Under $5 // Ammo the Dachshund

DIY CHALKBOARD DOG BOWL

Materials:

  • A ceramic bowl (mine came from Homegoods) $4
  • Frog Tape (I had a roll on hand) $7
  • Chalkboard Spraypaint (I also had a can of this on hand) $5

DIY Chalkboard Dog Bowl - Under $5 // Ammo the Dachshund

DIY Chalkboard Dog Bowl - Under $5 // Ammo the Dachshund

Step 1: Using the frog tape, tape off the portion of your bowl that you do not want to have chalkboard paint on it. You may need some help from someone who doesn’t have paws!

DIY Chalkboard Dog Bowl - Under $5 // Ammo the Dachshund

DIY Chalkboard Dog Bowl - Under $5 // Ammo the Dachshund

Step 2: Using even coats, spray your bowl with chalkboard paint. You may also need some help to get the cap off your spray paint.

DIY Chalkboard Dog Bowl - Under $5 // Ammo the Dachshund

DIY Chalkboard Dog Bowl - Under $5 // Ammo the Dachshund

Once your bowl is completely dry it will be ready to write on with chalk! You may want to prep the surface first by applying a coat of chalk evenly across the entire bowl and erasing it before writing on it.

DIY Chalkboard Dog Bowl - Under $5 // Ammo the Dachshund

DIY Chalkboard Dog Bowl - Under $5 // Ammo the Dachshund

Of course any dog bowl is much much better with food in it!

DIY Chalkboard Dog Bowl - Under $5 // Ammo the Dachshund

Yum! Everything tastes better in my trendy Chalkboard Food Bowl! Ammo the Dachshund

5 Minute No Sew DIY Easter Bowtie for your Pet

You all know I love a good DIY project, and when it takes less then 5 minutes and requires no sewing (for my mom who is not so handy with a needle and thread) it’s just an added bonus!

5 Minute No Sew DIY Easter Bowtie for your Dog // Ammo the Dachshund

So for Easter this year my mom helped me whip up some quick DIY Bowties that I can wear when all my family comes to visit on Sunday. They’re so fun and easy to make that I can’t even decide which one to wear!

5 Minute No Sew DIY Easter Bowtie for your Pet

5 Minute No Sew DIY Easter Bowtie for your Dog // Ammo the Dachshund

What you need:

  • Scissors or Rotary cutter
  • Ruler
  • Fabric
  • Iron (optional)

Step 1: Cut a long rectangular piece of fabric (Mom cut mine 5″ x 19″ to make my small bow tie). The longer and wider you make your rectangle the bigger your bow tie will be. You will also want to cut a thinner strip of fabric, mine was 2″ x 19″, to be used later.

Step 2: Using your large rectangular piece of fabric fold in the edges. You can use an iron to crease the folds if need be.

5 Minute No Sew DIY Easter Bowtie for your Dog // Ammo the Dachshund

Step 3: Next fold your ends towards the center so that they just overlap where the center mark would be.

5 Minute No Sew DIY Easter Bowtie for your Dog // Ammo the Dachshund

5 Minute No Sew DIY Easter Bowtie for your Dog // Ammo the Dachshund

Step 4: Fold the entire piece of fabric in half.

5 Minute No Sew DIY Easter Bowtie for your Dog // Ammo the Dachshund

Step 5: With the front of your bowtie facing you, crease it into 3 even pleats. Then place a clothespin on it to hold it in place while you move to the next step.

5 Minute No Sew DIY Easter Bowtie for your Dog // Ammo the Dachshund

5 Minute No Sew DIY Easter Bowtie for your Dog // Ammo the Dachshund

Step 6: Using the small strip of fabric you cut, fold in the edges.

5 Minute No Sew DIY Easter Bowtie for your Dog // Ammo the Dachshund

Step 7: Wrap the thin strip of fabric around your bowtie and tie in a double knot in the back.

5 Minute No Sew DIY Easter Bowtie for your Dog // Ammo the Dachshund

5 Minute No Sew DIY Easter Bowtie for your Dog // Ammo the Dachshund

5 Minute No Sew DIY Easter Bowtie for your Dog // Ammo the Dachshund

Step 8: Tie your Bowtie around one of your dogs collars, trimming any excess fabric if need be.

5 Minute No Sew DIY Easter Bowtie for your Dog // Ammo the Dachshund

You’re now ready for an Easter Party!

5 Minute No Sew DIY Easter Bowtie for your Dog // Ammo the Dachshund

Now if I could only decide which one to wear!

5 Minute No Sew DIY Easter Bowtie for your Dog // Ammo the Dachshund

P.S. I expect to see lots of dogs in dapper bowties this Easter! Post your dog in their best bowtie on my Facebook wall so we can enjoy them all! Ammo the Dachshund

Easter Egg Hunt for the Dogs

Easter Egg Hunt for the Dogs // Ammo the Dachshund

Easter is this weekend, so mom decided we could have a little pre-Easter fun by having an Easter Egg Hunt!

Incase you didn’t want to miss out on the fun either, here’s what you’ll need to have your very own Dog Friendly Easter Egg Hunt:

  • Plastic Easter Eggs
  • Small Dog Treats
  • An excited Pup that’s ready to hunt for eggs!

Easter Egg Hunt for the Dogs // Ammo the Dachshund

Simply fill your eggs with the treats and place them around the house or yard for your dog to find.

Easter Egg Hunt for the Dogs // Ammo the Dachshund

You can also use the egg hunt as a way to work on some training. Asking your dog to sit and wait before hunting for the eggs helps them learn patience.

Easter Egg Hunt for the Dogs // Ammo the Dachshund

Easter Egg Hunt for the Dogs // Ammo the Dachshund

Make sure to supervise your pet during the egg hunt, as you will have to help them open the eggs once found (it’s those cumbersome paws)! Also be sure to make sure they don’t chew on the eggs, as they can break easily.

Easter Egg Hunt for the Dogs // Ammo the Dachshund

Easter Egg Hunt for the Dogs // Ammo the Dachshund

Easter Egg Hunt for the Dogs // Ammo the Dachshund

Next time I think I’ll have to invite my friends over to partake in all the fun!

Happy Easter! Ammo the Dachshund


Valentine’s Day DIY – Dog Collar Heart Accessory

Valentine’s Day is almost here, so with a little help from my mom I whipped up this happy heart DIY to help you spread some love any day of the year!

Valentine's Day DIY // Heart Collar Accessory for your Dog // Ammo the Dachshund

DIY – Dog Collar Heart Accessory

This simple DIY can be made with a few items that you can likely find laying around your house.

What you need:

  • Scissors
  • A few small scraps of fabric
  • Needle and thread
  • Elastic
  • Sharpie
  • Dog Collar
  • Cotton stuffing (don’t have any on hand? you could always use some paper towels or tissues)
  • Embroidery thread (substitute needle and thread if you don’t have any)
  • Metallic paint (optional)
  • Pencil with eraser (optional)

Valentine's Day DIY // Heart Collar Accessory for your Dog // Ammo the Dachshund

Step 1: Using a sharpie draw two small heart shapes onto your fabric. You may want to draw one on a plain piece of printer paper first and cut it out to use as a stencil.

Valentine's Day DIY // Heart Collar Accessory for your Dog // Ammo the Dachshund

Step 2: Cut both hearts out of your fabric.

Valentine's Day DIY // Heart Collar Accessory for your Dog // Ammo the Dachshund

Step 3: If you are using a plain piece of fabric then you may want to add a little Bling. By using the eraser end of your pencil you can stamp some dots of gold metallic paint onto your fabric hearts.

Valentine's Day DIY // Heart Collar Accessory for your Dog // Ammo the Dachshund

Step 4: Next measure the width of your dog collar, add about an inch, and cut this length out of your elastic. Once your paint is dry on your hearts you will want to sew a piece of looped elastic to the painted side with a needle and thread.

Valentine's Day DIY // Heart Collar Accessory for your Dog // Ammo the Dachshund

Step 5: Place your heart cutouts on top of each other (paint side up) and begin to stitch the two together using a piece of embroidery floss (or regular thread if that’s all you have). Stop stitching when you are about 3/4 of the way around.

Valentine's Day DIY // Heart Collar Accessory for your Dog // Ammo the Dachshund

Step 6: Stuff your heart with cotton filler (or any other stuffing you would like to use) and then stitch your heart the rest of the way shut.

Valentine's Day DIY // Heart Collar Accessory for your Dog // Ammo the Dachshund

Your heart collar accessory is now complete, and you can slip it onto your dog’s collar.

Valentine's Day DIY // Heart Collar Accessory for your Dog // Ammo the Dachshund

Valentine's Day DIY // Heart Collar Accessory for your Dog // Ammo the Dachshund

I don’t know about you, but I think it totally says I LOVE YOU!

Valentine's Day DIY // Heart Collar Accessory for your Dog // Ammo the Dachshund

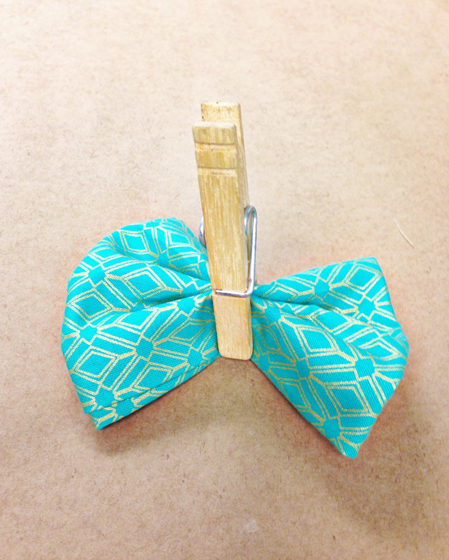
If you decide not to add paint to your happy little heart, you may want to use a fun fabric instead – just like the one my mom made below.

Valentine's Day DIY // Heart Collar Accessory for your Dog // Ammo the Dachshund

I’m totally wearing my heart on my sleeve neck!

Valentine's Day DIY // Heart Collar Accessory for your Dog // Ammo the Dachshund

If you’re looking for more ways to spread a little love this year, make sure you check out my online SHOP for Valentine’s Day Greetings and more! Ammo the Dachshund

The collars I am wearing in this feature are from the lovely Mattie & Margot, and they have lots of great colors that would look oh so sweet with a happy little heart on them. 

Also you can fetch the id tag I’m wearing above from Blanket ID.

Hello Dolly – Dog Approved DIY Doll Beds

Hello Dolly // DIY Doll Bed - dog approved // Ammo the Dachshund

Did I ever tell you that I live with a crafty bunch of people? Oh yes, so when it came time to get a birthday gift for my cousin Maddie, we didn’t just go to the store to buy something, no we strapped on our tool belts and made a doll bed! Ok well Dad strapped on his tool belt, but I knew just what to do when the doll bed was ready.

Hello Dolly // DIY Doll Bed - dog approved // Ammo the Dachshund

So since my Dad made a super sweet bed for my cousin’s doll, I figured the least I could do was make sure it passed the rigorous doll bed test. Incase you need to put a doll bed to the test too, here’s my guidelines for dog approved doll accessories.

Ammo’s Doll Bed Testing Guidelines

Hello Dolly // DIY Doll Bed - dog approved // Ammo the Dachshund

Hello Dolly // DIY Doll Bed - dog approved // Ammo the Dachshund

Test 1 – The Jumping Test: No doll bed is doll ready unless it can pass the jumping on the bed test. So put your paws to work and get to jumping on that bed! This one gets an A++ for jumpiness!

Hello Dolly // DIY Doll Bed - dog approved // Ammo the Dachshund

Test 2 – The Prayer Test: We all know that dolls have to say their prayers before bed, so get your prayers ready! I prayed for more cookies – although mom says I may have mixed up praying and wishes, but regardless the doll bed passed!

Hello Dolly // DIY Doll Bed - dog approved // Ammo the Dachshund

Test 3 – The Stretching Test: Make sure there is enough room on your doll bed for stretching out. If your sausage body can’t fit than you can bet miss dolly won’t either. Plenty of room here for my hot dog!

Hello Dolly // DIY Doll Bed - dog approved // Ammo the Dachshund

Hello Dolly // DIY Doll Bed - dog approved // Ammo the Dachshund

Test 4 – The Monsters Under the Bed Test: And the final and most important step in doll bed testing is to make sure there aren’t any monsters under the bed. I checked, and thank goodness Dad built a monster free bed.

Hello Dolly // DIY Doll Bed - dog approved // Ammo the Dachshund

Well, it looks like my cousin’s doll bed passed the test and now it’s ready for lots of dolly activities. I really hope I can come over for slumber parties! Especially if there’s popcorn. Ammo the Dachshund

12 Days of Cheer! DIY Christmas Eve Outfit for your Dog

Yippee, it’s Christmas Eve! If you’re anything like me you are getting out your best Holiday Outfit to wear to all of the upcoming Holiday parties and festivities.

This year I decided to whip up some special festive wear – a simple DIY to make you look oh-so-spiffy this Christmas.

Disclaimer: this post does contain some affiliate links

12 Days of Cheer! DIY Christmas Eve Outfit for your Dog via Ammo the Dachshund

DIY Christmas Eve Outfit for Dogs

Materials:

  • Clip-on Tie or bowtie* (I got mine from goodwill)
  • White Collared Shirt* (I also got this from goodwill)
  • Velcro
  • Scissors
  • Hot Glue

12 Days of Cheer! DIY Christmas Eve Outfit for your Dog via Ammo the Dachshund

Step 1: Cut just the collar off of the shirt.

12 Days of Cheer! DIY Christmas Eve Outfit for your Dog via Ammo the Dachshund

Step 2: Cut the collar in half at the back of it.

12 Days of Cheer! DIY Christmas Eve Outfit for your Dog via Ammo the Dachshund

Step 3: Glue velcro to the back of the collar, you may need to measure your dog’s neck to see where to position the velcro.

12 Days of Cheer! DIY Christmas Eve Outfit for your Dog via Ammo the Dachshund

Step 4: Take your clip-on tie and shorten the length of the tie to an appropriate length for your dog by pushing the excess fabric up and through the knot of the tie.

12 Days of Cheer! DIY Christmas Eve Outfit for your Dog via Ammo the Dachshund

Step 5: Cut off the excess tie fabric at the top, leaving enough that you can glue it later.

12 Days of Cheer! DIY Christmas Eve Outfit for your Dog via Ammo the Dachshund

Step 6: Hot glue the ends of your tie back into place.

12 Days of Cheer! DIY Christmas Eve Outfit for your Dog via Ammo the Dachshund

Step 7: Clip the tie onto the collar and you’re ready for a festive night!

12 Days of Cheer! DIY Christmas Eve Outfit for your Dog via Ammo the Dachshund

I must admit, my festive Holiday outfit makes me so ridiculously good looking! Not the DIY type? Don’t worry, you can snag a festive pre-made bowtie for your pup* for any occasion!

So what will you’re pets be wearing this Christmas? Holiday bowtie, Christmas sweater or maybe – dare I say it – your birthday suit? Do tell!Ammo the Dachshund


12 Days of Cheer! DIY Pet Snowglobe

It may not be snowing in Pennsylvania just yet, but that won’t stop me from creating my own magical winter wonderland this Christmas!

Today we’re making magical DIY Pet Snowglobes!

12 Days of Cheer! DIY Pet Snowglobe via Ammo the Dachshund

DIY Pet Snowglobes

Materials:

12 Days of Cheer! DIY Pet Snowglobe via Ammo the Dachshund

Step 1: Mold your sculpy into a “snow mound” that will fit inside the lid of the jar. Make sure sure that it can fit inside the jar lid with the jar on top.

Step 2: Bake your sculpy in the oven at the temperature and time specified on the package. Allow to cool.

12 Days of Cheer! DIY Pet Snowglobe via Ammo the Dachshund

Step 3: Using a hot glue gun attach the “snow mound” to the lid of your jar. Then glue the dog figurine on top of it.

12 Days of Cheer! DIY Pet Snowglobe via Ammo the Dachshund

Step 4: Add glitter to your jar.

12 Days of Cheer! DIY Pet Snowglobe via Ammo the Dachshund

Step 5: Add water to your jar, making sure you don’t overfill it.

12 Days of Cheer! DIY Pet Snowglobe via Ammo the Dachshund

Step 6: Screw the lid onto the jar, shake, and enjoy!

12 Days of Cheer! DIY Pet Snowglobe via Ammo the Dachshund

12 Days of Cheer! DIY Pet Snowglobe via Ammo the Dachshund

It’s magical isn’t it?

12 Days of Cheer! DIY Pet Snowglobe via Ammo the Dachshund

I’m very much enjoying my snowglobe – it has just the right amount of Christmas Cheer!


This DIY was inspired by this tutorial from ModCloth.Ammo the Dachshund